Self‑hosting is amazing… right up until you realise you want to move multiple terabytes of media and torrents from one box to another without losing watch history, metadata, or qBittorrent’s idea of what’s already downloaded. 😅
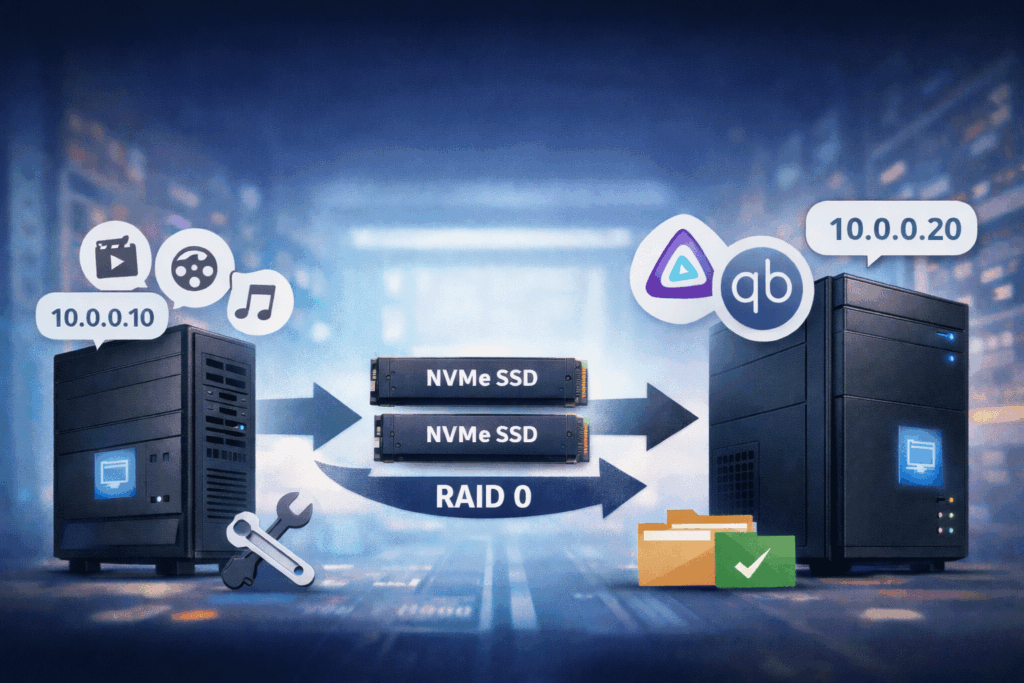
This post walks through how I migrated Jellyfin and qBittorrent from an old OpenMediaVault (OMV) server to a new one, while:
- keeping all Jellyfin databases & metadata ✅
- preserving all completed torrents and resume data ✅
- moving data from a single NVMe SSD to a new RAID0 array ✅
- organising containers and data cleanly on the new host ✅
All examples are simplified and use fake UUIDs for the disks, e.g.:
- Old media SSD:
/srv/dev-disk-by-uuid-AAAA1111-2222-3333-4444-AAAA1111AAAA - New RAID0:
/srv/dev-disk-by-uuid-BBBB2222-3333-4444-5555-BBBB2222BBBB
Use your own paths and UUIDs from OMV.
1. Setup: two OMV servers, two roles 🖥️➡️🖥️
The environment looked like this:
- Old OMV server (source)
- IP:
10.0.0.10 - Jellyfin container (
jellyfin/jellyfin:latest) - qBittorrent container (
lscr.io/linuxserver/qbittorrent:latest) - Media and torrents on a single NVMe:
/srv/dev-disk-by-uuid-AAAA1111-2222-3333-4444-AAAA1111AAAA/Torrent
- Paths inside the containers:
- Jellyfin:
/config→/home/media/docker-app/jellyfin/config/media→/srv/dev-disk-by-uuid-AAAA…/Torrent
- qBittorrent:
/config→/srv/dev-disk-by-uuid-AAAA…/qbittorrent_config/config/downloads→/srv/dev-disk-by-uuid-AAAA…/Torrent/scripts→/srv/dev-disk-by-uuid-AAAA…/scripts
- Jellyfin:
- IP:
- New OMV server (target)
- IP:
10.0.0.20 - Fresh OMV install
- Has its own big data array (for temporary migration storage), e.g.:
/srv/dev-disk-by-uuid-CCCC3333-4444-5555-6666-CCCC3333CCCC/raid_data
- Will receive both NVMe drives from the old server and assemble them into RAID0 →
/dev/md1mounted as:/srv/dev-disk-by-uuid-BBBB2222-3333-4444-5555-BBBB2222BBBB
- IP:
The plan was:
- Rsync all important data from the old OMV to the new OMV (onto the big existing array).
- Physically move the NVMe disks to the new server and build RAID0 on them.
- Copy the data from the temporary migration folder to the new RAID0.
- Run Jellyfin and qBittorrent in a new
docker-composestack, pointing their volumes to the new locations.
2. Inspecting the old OMV server 🔍
2.1. Find where the data actually lives
On the old server, I first checked block devices and mount points:
lsblk -f

df -h
``

I cared about:

- which disk had the `Torrent` directory
- where the Jellyfin and qBittorrent configs actually lived

Then I asked Docker directly:

```bash
docker inspect jellyfin | jq '.[0].Mounts'

docker inspect qbittorrent | jq '.[0].Mounts'
The result (simplified) looked like this:
Jellyfin Mounts:
[
  {
    "Type": "bind",
    "Source": "/home/media/docker-app/jellyfin/config",
    "Destination": "/config"
  },
  {
    "Type": "bind",
    "Source": "/srv/dev-disk-by-uuid-AAAA1111-2222-3333-4444-AAAA1111AAAA/Torrent",
    "Destination": "/media"
  }
]

qBittorrent Mounts:
[
  {
    "Type": "bind",
    "Source": "/srv/dev-disk-by-uuid-AAAA1111-2222-3333-4444-AAAA1111AAAA/qbittorrent_config/config",
    "Destination": "/config"
  },
  {
    "Type": "bind",
    "Source": "/srv/dev-disk-by-uuid-AAAA1111-2222-3333-4444-AAAA1111AAAA/Torrent",
    "Destination": "/downloads"
  },
  {
    "Type": "bind",
    "Source": "/srv/dev-disk-by-uuid-AAAA1111-2222-3333-4444-AAAA1111AAAA/scripts",
    "Destination": "/scripts"
  }
]
In other words:
- One shared directory
Torrentwas used both by Jellyfin (as/media) and qBittorrent (as/downloads). - Jellyfin config lived in the user’s home.
- qBittorrent config and scripts lived alongside the
Torrentdataset on the same SSD.
3. Creating a safe migration backup with rsync 🧳
Before touching disks or RAID, I wanted a full copy of everything on the new server.
On the new OMV server I prepared a migration directory on the large existing array:
MIG_ROOT="/srv/dev-disk-by-uuid-CCCC3333-4444-5555-6666-CCCC3333CCCC/raid_data/migration"

sudo mkdir -p "$MIG_ROOT"
Then I wrote a small Bash script on the new server to pull data over SSH from the old one:
#!/usr/bin/env bash
set -euo pipefail

MIG_ROOT="/srv/dev-disk-by-uuid-CCCC3333-4444-5555-6666-CCCC3333CCCC/raid_data/migration"
SRC_HOST="10.0.0.10"
SRC_USER="admin"

# rsync options
RSYNC_OPTS=(-aHAX --info=progress2)

# Ensure destination root exists
sudo mkdir -p "$MIG_ROOT"

# Jellyfin config (bind: /home/media/docker-app/jellyfin/config -> /config)
sudo mkdir -p "$MIG_ROOT/jellyfin_config"
sudo rsync "${RSYNC_OPTS[@]}" \
  "${SRC_USER}@${SRC_HOST}:/home/media/docker-app/jellyfin/config/" \
  "$MIG_ROOT/jellyfin_config/"

# Shared media/downloads (Torrent)
sudo mkdir -p "$MIG_ROOT/torrent_data"
sudo rsync "${RSYNC_OPTS[@]}" \
  "${SRC_USER}@${SRC_HOST}:/srv/dev-disk-by-uuid-AAAA1111-2222-3333-4444-AAAA1111AAAA/Torrent/" \
  "$MIG_ROOT/torrent_data/"

# qBittorrent config
sudo mkdir -p "$MIG_ROOT/qbit_config"
sudo rsync "${RSYNC_OPTS[@]}" \
  "${SRC_USER}@${SRC_HOST}:/srv/dev-disk-by-uuid-AAAA1111-2222-3333-4444-AAAA1111AAAA/qbittorrent_config/config/" \
  "$MIG_ROOT/qbit_config/"

# qBittorrent scripts
sudo mkdir -p "$MIG_ROOT/qbit_scripts"
sudo rsync "${RSYNC_OPTS[@]}" \
  "${SRC_USER}@${SRC_HOST}:/srv/dev-disk-by-uuid-AAAA1111-2222-3333-4444-AAAA1111AAAA/scripts/" \
  "$MIG_ROOT/qbit_scripts/"
💡 Important: I stopped both containers on the old server before running this script:
docker stop jellyfin qbittorrentThat way, config and databases would not be changing during the copy.
After rsync completed, I checked that the sizes matched roughly between old paths and the migrated copies:
# Old server (rough size)
ssh [email protected] 'du -sh /srv/dev-disk-by-uuid-AAAA1111-2222-3333-4444-AAAA1111AAAA/Torrent'
ssh [email protected] 'du -sh /home/media/docker-app/jellyfin/config'
ssh [email protected] 'du -sh /srv/dev-disk-by-uuid-AAAA1111-2222-3333-4444-AAAA1111AAAA/qbittorrent_config/config'

# New server (migration copy)
du -sh "$MIG_ROOT/torrent_data" "$MIG_ROOT/jellyfin_config" "$MIG_ROOT/qbit_config"
Once I was happy that everything had landed on the new OMV, it was time to shut down the old box.
4. Moving the NVMe drives and building RAID0 ⚙️
With the backup safely on the new server, I powered down the old one:
ssh [email protected] 'shutdown -h now'Then I physically moved the two NVMe SSDs from the old machine into the new OMV server.
Inside the OMV web UI on the new server:
- Storage → Disks → verify both NVMe drives are visible.
- Wipe both drives (Quick) — this is safe now because all data is already backed up.
- Storage → Multiple Devices → Create:
- Level:
Stripe (this is RAID0) - Select both NVMe drives
- Level:
After mdadm finished initialising the array, I saw /dev/md1 as the new RAID0 device.
Next, I created a filesystem:
- Storage → File Systems → Create
- Filesystem:
ext4 - Device:
/dev/md1
- Filesystem:
OMV mounted it at a path like:
/srv/dev-disk-by-uuid-BBBB2222-3333-4444-5555-BBBB2222BBBBI’ll call this mount point DATA_MOUNT in the next steps.
5. Laying out data on the new RAID0 📂
On the new server, I created a tidy directory structure on the RAID0 array:
DATA_MOUNT="/srv/dev-disk-by-uuid-BBBB2222-3333-4444-5555-BBBB2222BBBB"
DATA_ROOT="$DATA_MOUNT/jelly_qbit_data"

sudo mkdir -p "$DATA_ROOT"
I wanted something that logically mirrored the old layout but under a single root:
jelly_qbit_data/jellyfin_config→/configfor Jellyfinjelly_qbit_data/Torrent→/mediafor Jellyfin,/downloadsfor qBittorrentjelly_qbit_data/qbittorrent_config/config→/configfor qBittorrentjelly_qbit_data/scripts→/scriptsfor qBittorrent
So I created the folders:
sudo mkdir -p \
  "$DATA_ROOT/jellyfin_config" \
  "$DATA_ROOT/Torrent" \
  "$DATA_ROOT/qbittorrent_config/config" \
  "$DATA_ROOT/scripts"

ls -R "$DATA_ROOT"
Now it was time to restore the migration backup onto this new layout.
5.1. Restoring from the migration backup
MIG_ROOT="/srv/dev-disk-by-uuid-CCCC3333-4444-5555-6666-CCCC3333CCCC/raid_data/migration"
DATA_MOUNT="/srv/dev-disk-by-uuid-BBBB2222-3333-4444-5555-BBBB2222BBBB"
DATA_ROOT="$DATA_MOUNT/jelly_qbit_data"

# Jellyfin config
sudo rsync -aHAX --info=progress2 \
  "$MIG_ROOT/jellyfin_config/" \
  "$DATA_ROOT/jellyfin_config/"

# Shared Torrent data
sudo rsync -aHAX --info=progress2 \
  "$MIG_ROOT/torrent_data/" \
  "$DATA_ROOT/Torrent/"

# qBittorrent config
sudo rsync -aHAX --info=progress2 \
  "$MIG_ROOT/qbit_config/" \
  "$DATA_ROOT/qbittorrent_config/config/"

# qBittorrent scripts
sudo rsync -aHAX --info=progress2 \
  "$MIG_ROOT/qbit_scripts/" \
  "$DATA_ROOT/scripts/"
A quick sanity check:
ls -la "$DATA_ROOT/jellyfin_config" | head
ls -la "$DATA_ROOT/Torrent" | head
ls -la "$DATA_ROOT/qbittorrent_config/config" | head
ls -la "$DATA_ROOT/scripts" | head
5.2. Fixing permissions 👮
Most self‑hosted media stacks use a dedicated UID/GID for containers, often 1000:100 for linuxserver images.
To avoid permission issues, I normalised ownership:
sudo chown -R 1000:100 "$DATA_ROOT"You should adjust 1000:100 to whatever your containers expect (PUID / PGID environment variables).
6. Running Jellyfin & qBittorrent on the new server 🐳
I like keeping all Docker stacks under /srv/docker, so on the new OMV I created a dedicated stack for media services:
sudo mkdir -p /srv/docker/media-stack
sudo nano /srv/docker/media-stack/docker-compose.yml
Here’s the docker-compose.yml I ended up with (simplified but complete):
version: "3.9"

services:
  jellyfin:
    image: jellyfin/jellyfin:latest
    container_name: jellyfin
    environment:
      - TZ=UTC
    volumes:
      # Jellyfin config (old: /home/media/docker-app/jellyfin/config)
      - /srv/dev-disk-by-uuid-BBBB2222-3333-4444-5555-BBBB2222BBBB/jelly_qbit_data/jellyfin_config:/config
      # Media library (old: .../Torrent)
      - /srv/dev-disk-by-uuid-BBBB2222-3333-4444-5555-BBBB2222BBBB/jelly_qbit_data/Torrent:/media
    ports:
      - 8096:8096
    restart: unless-stopped

  qbittorrent:
    image: lscr.io/linuxserver/qbittorrent:latest
    container_name: qbittorrent
    environment:
      - TZ=UTC
      - PUID=1000          # match ownership on DATA_ROOT
      - PGID=100
      - WEBUI_PORT=8080
    volumes:
      # qBittorrent config
      - /srv/dev-disk-by-uuid-BBBB2222-3333-4444-5555-BBBB2222BBBB/jelly_qbit_data/qbittorrent_config/config:/config
      # Downloads (shared Torrent dir)
      - /srv/dev-disk-by-uuid-BBBB2222-3333-4444-5555-BBBB2222BBBB/jelly_qbit_data/Torrent:/downloads
      # Scripts
      - /srv/dev-disk-by-uuid-BBBB2222-3333-4444-5555-BBBB2222BBBB/jelly_qbit_data/scripts:/scripts
    ports:
      - 8080:8080
      - 6881:6881
      - 6881:6881/udp
    restart: unless-stopped
Key points:
- The internal paths stayed identical to the old server:
- Jellyfin still sees
/configand/media. - qBittorrent still sees
/config,/downloadsand/scripts.
- Jellyfin still sees
- Only the host paths changed — they now point to the new RAID0 mount.
With that file saved, I started the stack:
cd /srv/docker/media-stack

# If using Docker Compose v2
docker compose up -d

# Or Docker Compose v1
# docker-compose up -d
A quick check:
docker psBoth jellyfin and qbittorrent should be Up.
7. Verifying everything works ✅
Moment of truth time. 😅
7.1. Jellyfin
I opened:
http://10.0.0.20:8096And checked:
- I did not see the first‑time setup wizard.
- My existing users and admin account were there.
- Libraries were already configured and pointing at the right folders.
- Watch history and metadata were intact.
If you see a fresh setup instead:
- Confirm the mount points:
docker inspect jellyfin | jq '.[0].Mounts' - Ensure
/configreally points to the restoredjellyfin_configdirectory on RAID0.
7.2. qBittorrent
Next, I opened:
http://10.0.0.20:8080I expected to see:
- The same login as on the old server.
- The full torrent list (not empty).
- Most torrents in
Completed/Seedingstate.
If torrents show as missing or errored:
- Verify
Torrentdata actually contains the files. - Check mounts:
docker inspect qbittorrent | jq '.[0].Mounts'/downloadsmust point to the newjelly_qbit_data/Torrentdirectory. - If some paths changed inside qBittorrent, you may need to force recheck a few torrents or adjust save paths, but in my case keeping the
/downloadsmapping identical was enough.
8. Cleaning up migration data 🧹
Once everything was confirmed working and stable for a while (I let it run for a bit), it was time to remove the temporary migration data on the big array.
On the new server:
MIG_ROOT="/srv/dev-disk-by-uuid-CCCC3333-4444-5555-6666-CCCC3333CCCC/raid_data/migration"

# Double-check what is inside before deleting
ls -la "$MIG_ROOT"

# If everything looks as expected, remove it
sudo rm -rf "$MIG_ROOT"
A df -h afterwards confirmed that space had been freed.
9. Lessons learned & tips 🧠
A few takeaways from this migration:
- Separate containers from data clearly.
- Keep Docker stacks (compose files) in one place (e.g.
/srv/docker/...). - Keep long‑lived data on dedicated disks/arrays and reference them via volumes.
- Keep Docker stacks (compose files) in one place (e.g.
- Always identify real data paths via
docker inspect.- Don’t trust your memory. The container might be using a different directory than you think.
- Stop containers before rsync.
- Especially for databases and
.fastresumefiles. This avoids corrupted state.
- Especially for databases and
- Use a staging migration directory.
- Copy data to a temporary location on the new server before destroying or repartitioning any disks.
- Preserve internal paths.
- If the container still sees
/mediaand/downloadsexactly as before, apps like Jellyfin and qBittorrent barely notice that anything changed under the hood.
- If the container still sees
- Permissions will bite you if you ignore them.
- Normalise ownership on the new filesystem to match your containers’ PUID/PGID.
- Only clean up when you’re really done.
- Keep the migration copy until you’ve run on the new setup for a while.
10. Final thoughts 🎉
Migrating self‑hosted services can look scary, especially when multiple terabytes of data and carefully curated libraries are involved. But with a bit of planning, some rsync, and a clear separation between containers and data, it’s absolutely manageable.
The key mindset:
Treat containers as disposable, and disks/folders as the source of truth.
If you follow that, moving from one OMV server to another becomes much closer to a careful file copy than a full re‑deployment.
Happy self‑hosting! 🚀📺🧲
Leave a Reply