If you’re running Home Assistant OS with Nginx Proxy Manager as an add-on and have multiple services exposed to the internet — Bitwarden, Nextcloud, Jellyfin, Home Assistant itself — your setup is under constant automated attack. This guide shows you exactly how to deploy CrowdSec with Nginx Proxy Manager entirely within the Home Assistant ecosystem, using official add-ons, no Docker Compose required. 🛡️
Setting up CrowdSec with Nginx Proxy Manager as HA add-ons is one of the smartest security moves a homelab owner can make — and after reading this, you’ll have automatic IP banning, firewall-level blocking, and Telegram alerts running in under an hour.
Why the HA Add-on Approach Works So Well
When NPM runs as a Home Assistant add-on, its container is managed by HA Supervisor — not directly by you. You can’t simply mount shared volumes the way you would with a standard Docker Compose setup.
But here’s the elegant part: the official CrowdSec add-on reads the entire host system journal via journald, which includes logs from every other add-on running on the same machine — including Nginx Proxy Manager. 📋
This means CrowdSec with Nginx Proxy Manager gets full log visibility without any volume sharing tricks. One add-on, full coverage across all your proxied services.
What You’ll Deploy
Three components, all native to the HA ecosystem:
| Component | Role |
|---|---|
| CrowdSec add-on | Agent + Local API — reads logs, detects attacks, makes ban decisions |
| CrowdSec Firewall Bouncer add-on | Enforces bans at the nftables/firewall level |
| Telegram notifications | Real-time alerts to your phone 📱 |
The Firewall Bouncer is actually more effective than an Nginx-level bouncer — it blocks malicious IPs at the network layer before they even reach NPM. The combination of CrowdSec with Nginx Proxy Manager plus a firewall-level bouncer is as close to a complete first-line defense as you can get in a homelab. 🔥
Prerequisites
- Home Assistant OS (HAOS) version 8.0 or higher
- Nginx Proxy Manager running as a HA add-on
- SSH or Terminal add-on access
- A Telegram bot token and chat ID
Step 1: Add the CrowdSec Repository to Home Assistant
The CrowdSec apps are not in the default HA store — you need to add the official repository first.
1.1 Open Apps
Go to Settings → Apps → Install app (button in the bottom right corner).
1.2 Add the repository
Click the ⋮ menu (top right) → Repositories → Add (button in the bottom right corner) → paste the official URL:
https://github.com/crowdsecurity/home-assistant-addonsClick Add, then close the dialog.
1.3 Refresh the store
Hard-refresh the page (Ctrl+Shift+R). You should now see two new entries:
- CrowdSec
- CrowdSec Firewall Bouncer
Step 2: Install and Configure the CrowdSec Add-on
2.1 Install
Find CrowdSec in the list and click Install. This takes a minute or two.
2.2 Configure before first start
Before starting, go to the Configuration tab. Modify the collections section to cover both Home Assistant and NPM traffic:
acquisition: |
  ---
  source: journalctl
  journalctl_filter:
    - "--directory=/var/log/journal/"
  labels:
    type: syslog
disable_lapi: false
remote_lapi_url: ""
agent_username: ""
agent_password: ""
collections:
  - crowdsecurity/home-assistant
  - crowdsecurity/nginx-proxy-manager
  - crowdsecurity/http-cve
parsers: []
scenarios: []
postoverflows: []
parsers_to_disable:
  - crowdsecurity/whitelists
scenarios_to_disable: []
disable_online_api: false
The three collections do the following:
crowdsecurity/home-assistant— detects brute-force on HA login pagecrowdsecurity/nginx-proxy-manager— detects all attacks routed through NPM (this is the core of CrowdSec with Nginx Proxy Manager detection)crowdsecurity/http-cve— detects known CVE exploit attempts across all services
Click Save.
2.3 Start the add-on
Go to the Info tab → Start. Enable Start on boot and Watchdog.
2.4 Verify it’s running
Open the Log tab and look for:
level=info msg="Starting crowdsec v1.x.x"
level=info msg="Crowdsec Local API listening on 0.0.0.0:8080"
level=info msg="collection 'crowdsecurity/nginx-proxy-manager' installed"
💡 Enable Show in sidebar on the Info tab — this pins CrowdSec to the HA sidebar for quick access. You can then open the CrowdSec terminal any time directly from the sidebar without navigating through Settings.
Step 3: Verify NPM Logs Are Being Parsed
This is the most important verification step when running CrowdSec with Nginx Proxy Manager as HA add-ons — confirming that journald is actually capturing NPM traffic.
3.1 Open the CrowdSec terminal
Go to Settings → Apps → CrowdSec → OPEN WEB UI button. This opens a black terminal window directly in your browser with a prompt like root@xxxxxxxx-crowdsec:~#. All cscli commands in this guide are entered here.
3.2 Check acquisition metrics
cscli metricsIn the Acquisition Metrics section, look for source:journalctl with non-zero Lines Read values. Send a few test requests to any of your public subdomains and run the command again — the counter should increase.
3.3 Check loaded scenarios
cscli scenarios listYou should see entries like crowdsecurity/nginx-proxy-manager-bf, crowdsecurity/http-probing, crowdsecurity/http-crawl-non_statics. These are the detection patterns active for your CrowdSec with Nginx Proxy Manager setup. ✅
3.4 Troubleshooting: if Lines Read stays zero
If acquisition metrics show zero even after real traffic, check the acquisition config:
cat /config/.storage/crowdsec/config/acquis.yamlMake sure the source: journalctl block is present. If the file is missing or empty, the add-on may need a restart after the initial configuration save.
Step 4: Install the CrowdSec Firewall Bouncer Add-on
The agent detects and decides. The bouncer enforces — it’s what actually drops packets from banned IPs at the firewall level.
4.1 Install
Go to Settings → Apps → Install app, find CrowdSec Firewall Bouncer and click Install.
4.2 Generate a bouncer API key
Open the CrowdSec terminal: Settings → Apps → CrowdSec → OPEN WEB UI. In the terminal, run:
cscli bouncers add firewall-bouncerCopy the key immediately — you won’t see it again:
Api key for 'firewall-bouncer':

         a1b2c3d4e5f6g7h8i9...

Please keep this key since you will not be able to retrieve it!
4.3 Find the CrowdSec add-on hostname
Still in the same CrowdSec terminal (Settings → Apps → CrowdSec → OPEN WEB UI):
hostnameOutput will look like 424ccef4-crowdsec. This is the internal Docker hostname that the bouncer will use to connect to the CrowdSec LAPI.
4.4 Configure the Firewall Bouncer
Go to Settings → Apps → CrowdSec Firewall Bouncer → Configuration tab:
api_url: "http://424ccef4-crowdsec:8080/"
api_key: "YOUR_KEY_FROM_STEP_4.2"
update_frequency: "10s"
log_level: info
Replace 424ccef4-crowdsec with your actual hostname and paste in your API key. Click Save → Start → enable Start on boot.
4.5 Verify the bouncer is connected
cscli bouncers listfirewall-bouncer should appear as active with a recent Last Pull timestamp. 🎯
Step 5: Test the Full Pipeline
Before trusting this setup in production, test that the full chain — detection → decision → block — actually works.
5.1 Add a test ban
In the CrowdSec terminal (Settings → Apps → CrowdSec → OPEN WEB UI):
cscli decisions add --ip 1.2.3.4 --reason "test-ban" --duration 5m5.2 Verify the decision
cscli decisions list5.3 Verify the decision is active
Back in the CrowdSec terminal (Settings → Apps → CrowdSec → OPEN WEB UI):
cscli decisions listIf you see 1.2.3.4 in the list with ban type and active duration — the full chain works. CrowdSec detected → made a decision → Firewall Bouncer received it and is enforcing it. ✅
ℹ️ On HAOS the
nftcommand is not available in the standard terminal. Verifying viacscli decisions listis sufficient — if the decision appears here, the Firewall Bouncer is actively enforcing it at the network level.
5.4 Clean up
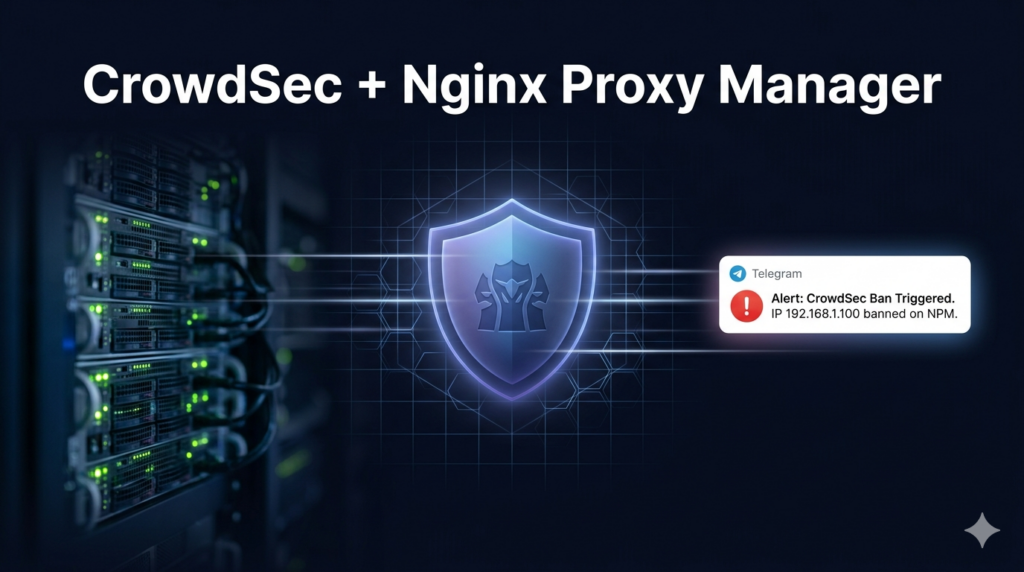
cscli decisions delete --ip 1.2.3.4Step 6: Set Up Telegram Notifications 📱
6.1 Create a Telegram bot
- Open Telegram → search
@BotFather→ send/newbot - Follow the prompts and save the bot token (
123456789:ABCdef...) - Send any message to your new bot
- Open:
https://api.telegram.org/botYOUR_TOKEN/getUpdates - Find
"chat"→"id"in the JSON — this is your chat ID
6.2 Create the notification config
Open the CrowdSec terminal (Settings → Apps → CrowdSec → OPEN WEB UI) and run the block below as a whole — copy everything from cat down to and including EOF, paste it in the terminal and press Enter. This creates the file in one shot, no editor needed:
mkdir -p /config/.storage/crowdsec/config/notifications

cat > /config/.storage/crowdsec/config/notifications/telegram.yaml << 'EOF'
type: http
name: telegram_notifications
log_level: info

format: |
  {
    "chat_id": "YOUR_CHAT_ID",
    "text": "🚨 *CrowdSec Alert*\n\nIP: {{range .Alerts}}{{range .Decisions}}{{.Value}}{{end}}{{end}}\nReason: {{range .Alerts}}{{range .Decisions}}{{.Reason}}{{end}}{{end}}\nAction: {{range .Alerts}}{{range .Decisions}}{{.Type}}{{end}}{{end}}\nDuration: {{range .Alerts}}{{range .Decisions}}{{.Duration}}{{end}}{{end}}",
    "parse_mode": "Markdown"
  }

url: https://api.telegram.org/botYOUR_BOT_TOKEN/sendMessage
method: POST
headers:
  Content-Type: application/json

group_wait: 5s
group_threshold: 1
EOF
Replace YOUR_CHAT_ID and YOUR_BOT_TOKEN with your actual values.
⚠️ Critical: Always write persistent config to
/config/.storage/crowdsec/config/. Files written directly to/etc/crowdsec/are lost on every add-on restart. This applies to all config changes in your CrowdSec with Nginx Proxy Manager setup.
6.3 Register the notification in profiles
vi /config/.storage/crowdsec/config/profiles.yaml💡 vim basics: press
ito enter edit mode, make your changes, then pressEscto exit edit mode. To save and quit type:wqand press Enter. To quit without saving type:q!.
Add the notifications line to the default profile:
name: default_ip_remediation
filters:
  - Alert.Remediation == true && Alert.GetScope() == "Ip"
decisions:
  - type: ban
    duration: 4h
notifications:
  - telegram_notifications
on_success: break
6.4 Restart and test
Go to Settings → Apps → CrowdSec → Restart, then in the CrowdSec terminal test the notification:
cscli notifications test telegram_notificationsYou should receive a Telegram message within seconds. 🎉
If nothing arrives and the Log tab shows this fatal error:
level=fatal msg="api server init: plugin broker: loading plugin: while getting process attributes: group: unknown group nobody"This is a known issue on HAOS — the nobody group doesn’t exist in the container. Fix it in the CrowdSec terminal:
vi /config/.storage/crowdsec/config/config.yamlFind the plugin_config section:
plugin_config:
  user: nobody
  group: nobody
Change both values to empty strings:
plugin_config:
  user: ""
  group: ""
Save and exit (:wq), then restart the add-on via Settings → Apps → CrowdSec → Restart. CrowdSec will now start without the fatal error and the notification plugin will work. Run the test again:
cscli notifications test telegram_notificationsStep 7: Join the Community Blocklist
Register free at https://app.crowdsec.net/. After registration:
- Log in to the console
- Go to Engines (left sidebar)
- Click + Add Security Engine
- You’ll see a command like
sudo cscli console enroll cl1234abcd5678efgh...— copy the command with the key but withoutsudo
Then in the CrowdSec terminal (Settings → Apps → CrowdSec → OPEN WEB UI) paste and run that command:
cscli console enroll cl1234abcd5678efgh...Restart the add-on via Settings → Apps → CrowdSec → Restart. CrowdSec will now pull a community blocklist — IPs already reported as malicious by thousands of other CrowdSec users. Pre-emptive blocking before a bad actor even tries anything against your server. 🌍
Step 8: Monitor Real Alerts
After a few hours, open the CrowdSec terminal (Settings → Apps → CrowdSec → OPEN WEB UI) and check what CrowdSec with Nginx Proxy Manager has already detected:
# Recent alerts with details
cscli alerts list -o human

# Currently banned IPs
cscli decisions list

# Full detection statistics
cscli metrics
Don’t be surprised if you see dozens of blocked IPs within the first 24 hours — brute-force attempts on Bitwarden and Nextcloud, path traversal probes, CVE scanners. The internet is a very noisy place. 😬
Bonus: Cloudflare Bouncer ☁️
If you’re using Cloudflare as a proxy in front of your services, there’s a powerful extra layer available: the CrowdSec Cloudflare Bouncer pushes banned IPs directly to Cloudflare’s firewall, blocking them before traffic even leaves Cloudflare’s network — one step earlier than the firewall bouncer.
cscli bouncers add cloudflare-bouncerThen configure with your Cloudflare API token (needs Zone:Firewall Services:Edit permission). Full setup: https://docs.crowdsec.net/docs/bouncers/cloudflare.
What Gets Detected Out of the Box
Once CrowdSec with Nginx Proxy Manager is running with the collections from Step 2, it detects:
| Attack Type | Services Protected |
|---|---|
| 🔴 HTTP brute-force | Bitwarden, Nextcloud, HA login |
| 🔴 HA login brute-force | Home Assistant directly |
| 🟠 Path traversal attempts | All proxied services |
| 🟠 CVE exploit probing | Nextcloud, Jellyfin |
| 🟠 Bad user agents | Masscan, ZGrab, sqlmap |
| 🟡 Request flood | All services |
For more on securing individual services:
- Self-hosted Bitwarden setup
- Nextcloud in Docker on OMV
- Self-host WireGuard VPN on Proxmox — for services that shouldn’t be publicly reachable at all
What CrowdSec Does NOT Cover
To set honest expectations: CrowdSec with Nginx Proxy Manager is an IPS, not a SIEM. It will not:
- Monitor file integrity on disk
- Detect rootkits or suspicious host processes
- Scan packages for CVE vulnerabilities
For deeper host-level auditing, Wazuh agents are the natural next step after this setup is running.
Conclusion
Deploying CrowdSec with Nginx Proxy Manager inside Home Assistant OS is simpler than it looks. Two add-ons, a few configuration edits in the HA UI, and you get automatic IP banning, firewall-level enforcement, community threat intelligence, and real-time Telegram alerts — all running natively alongside your existing setup. 🏠
The journald-based log architecture means CrowdSec with Nginx Proxy Manager gets full visibility into all proxied traffic without any filesystem workarounds. All config is persistent in /config/.storage/crowdsec/ and survives add-on updates and host reboots.
If you take one security step for your homelab this year — make it this one. 🌙
Quick Reference
| Command | Purpose |
|---|---|
cscli decisions list | Show currently blocked IPs |
cscli alerts list -o human | Show recent alerts with details |
cscli bouncers list | Show connected bouncers |
cscli metrics | Show detection and acquisition stats |
cscli scenarios list | List loaded detection scenarios |
cscli hub update && cscli hub upgrade | Update all collections |
cscli notifications test telegram_notifications | Send test Telegram alert |
cscli decisions add --ip X.X.X.X --duration 1h | Manually ban an IP |
cscli decisions delete --ip X.X.X.X | Remove a ban |
📁 All persistent config:
/config/.storage/crowdsec/config/
Also see: Dozzle in Docker for lightweight container log monitoring, and Portainer setup guide if you’re managing additional Docker services alongside Home Assistant.
Leave a Reply